Knowledge & Innovation

Aesthetic Medicine & 3D Imaging Blog

Latest clinical research, technical advances, and practice growth insights from LifeViz®.

0%

Midface Volume Correction Imaging can turn a vague impression of “looking tired” into a clearer clinical discussion. The midface is not one flat surface. It includes the lower eyelids, cheek contours, facial fat compartments, and the transition toward the nose and mouth. A standardized photograph may reveal asymmetry that a single mirror view hides. Lighting, head position, and camera distance matter. Small changes can distort comparison.

Facial plastic surgeon Dr. Rod J. Rohrich is widely recognized for his work in facial aesthetics. A cautious, non-verbatim summary of a whole-face assessment principle is: “Evaluate facial balance, not an isolated feature.” This is a paraphrase, not a direct quotation. That distinction matters when medical claims are presented to patients. Imaging can support assessment, but it cannot replace examination, medical history, or a qualified clinician’s judgment.

The seven tips in this guide focus on practical image quality: consistent lighting, neutral expression, repeatable angles, clear landmarks, and careful comparison over time. A side view may show a contour change that a frontal image misses. Yet images have limits. They can flatten depth, exaggerate shadows, and make normal asymmetry seem more important than it is. Real cases are messy. A useful review should note uncertainty rather than promise perfect measurement. Readers should treat photographs as one source of information, not as a diagnosis or a guarantee of treatment results.
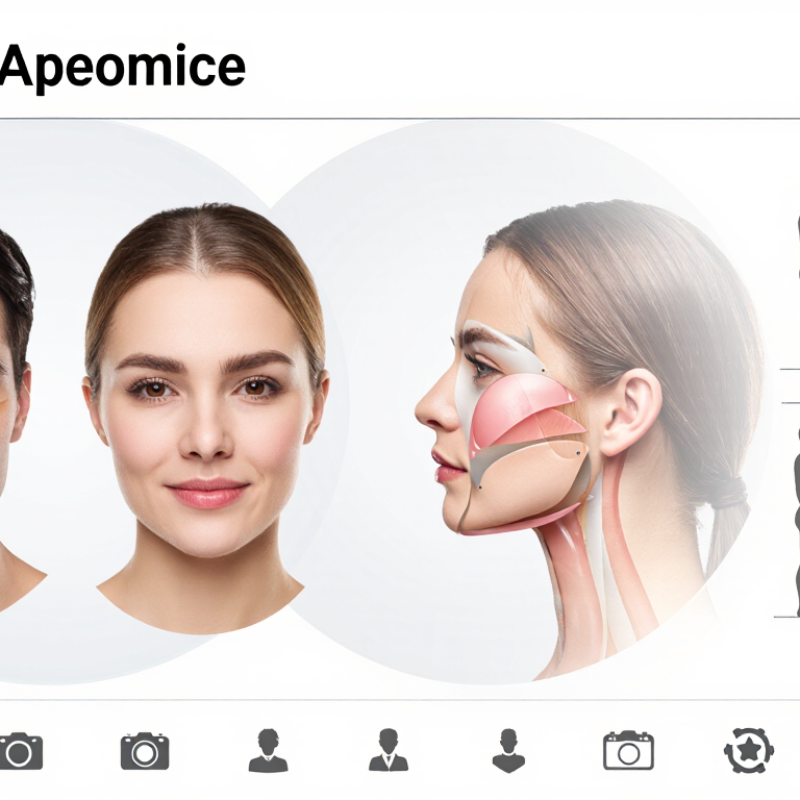
7 Tips for Midface Volume Correction Imaging

Midface Anatomy and the Role of Volume Imaging

The midface is not one smooth space. It contains layered fat compartments, muscles, retaining ligaments, bone, and important vessels. A shallow hollow beneath the eye may reflect volume loss, bone shape, or both. Imaging can help clarify these relationships, but it cannot explain every visible contour.

Standardized photographs are a useful starting point. Keep the camera distance, lighting, and facial expression consistent; overhead light can deepen shadows and exaggerate hollows. Ultrasound can show soft-tissue layers and some vessels in real time, while CT or MRI may be appropriate when a clinician needs broader anatomical detail. Each method has limits. Imaging should support a hands-on assessment, not replace it.

Small differences matter. Compare both sides, note prior surgery or injury, and consider how the cheek changes with smiling. Normal asymmetry is common. A scan is only a snapshot. Even careful maps have blind spots, and image interpretation can vary with technique and experience. The most reliable plan combines the patient’s concerns, clinical examination, and imaging when it is likely to change a decision.

Imaging Methods for Evaluating Midface Soft Tissues

Evaluating midface soft tissues works best when imaging answers a specific clinical question. Start with standardized photographs: use the same camera distance, head position, lighting, and facial expression each time. Soft, even light helps reveal contour without creating misleading shadows. Small changes matter. Record the date and any recent swelling or treatment, since both can affect appearance.

High-frequency ultrasound can show superficial tissue layers and may help assess localized findings. Its results depend on the operator, probe angle, and pressure, so gentle, consistent technique is important. MRI offers detailed soft-tissue contrast when deeper anatomy needs clarification. CT shows bone and surrounding structures clearly, but involves radiation; it is not usually the first choice for a soft-tissue question alone. Choose the method that fits the concern, not the one with the most striking images.

Compare both sides, but do not assume natural asymmetry signals a problem. Use matching image planes and note landmarks, such as the cheekbone and the area beside the nose. Review images alongside a physical examination and the person’s history. Imaging has limits. A scan can look precise while still leaving uncertainty about cause, tissue behavior, or the best next step. That uncertainty deserves honest documentation.

Landmarks for Assessing Volume Deficiency and Asymmetry

7 Tips for Midface Volume Correction Imaging

Landmarks for Assessing Volume Deficiency and Asymmetry

Reliable assessment starts with consistent images. Keep the head level, the camera at eye height, and the lighting even. Small changes in tilt can make one cheek appear fuller. Compare relaxed frontal and oblique views, then check the profile. A single still image can mislead.

Track the infraorbital rim and tear trough, where shadowing may suggest contour change but does not prove volume loss. Note the malar eminence, zygomatic arch, and transition between cheek and lower eyelid. Compare both sides against the facial midline. Also examine the nasolabial fold and pyriform area; nearby landmarks help distinguish localized flattening from broader facial proportions. Look carefully.

Record findings in plain, repeatable terms: location, visible difference, and image conditions. Avoid treating one shadow or fold as a diagnosis. Skin thickness, expression, age, and lighting all affect appearance. Where clinical imaging is appropriate, its choice should depend on the question and qualified assessment. Images support judgment; they cannot replace it. This distinction is easy to overlook.

Image-Guided Planning for Midface Volume Correction

7 Tips for Midface Volume Correction Imaging
Image-Guided Planning for Midface Volume Correction

Good planning begins with consistent images, not assumptions. Photograph the face from the front and both oblique angles, using even light and a neutral expression. Keep the camera distance and head position consistent. Small details matter. Shadows beneath the eyes or beside the nose can change how volume appears.

Images help clinicians compare facial proportions and discuss goals with patients. A three-dimensional scan may add useful context, but it cannot show every tissue layer or predict an outcome. When clinically appropriate, ultrasound can provide additional information about underlying anatomy. Imaging should support a trained clinician’s examination, not replace it. Document consent and explain how images will be stored and used.

Review images alongside the patient’s concerns, medical history, and in-person findings. Look for asymmetry, changes across views, and areas where lighting may exaggerate a hollow. Avoid treating a single photograph as a complete map. Images can still mislead. I have seen carefully framed pictures suggest certainty that the live examination did not support. If findings conflict, pause, improve the images, or seek another qualified opinion before planning correction.

Safety Checks and Follow-Up Imaging Criteria

Before midface volume correction, imaging should answer a clear clinical question, not simply produce a picture. Review prior procedures, relevant medical history, symptoms, and baseline facial asymmetry. Obtain consent and document the imaging method and date. Use consistent lighting and facial position for photographs; when ultrasound or other imaging is indicated, record the area examined and any limits in visibility. A normal image does not rule out every problem. It is only one part of assessment.

Follow-up should compare like with like. Note changes in swelling, tenderness, skin color, contour, and symmetry, and relate them to the patient’s symptoms and treatment timeline. A stable, expected appearance may need routine clinical review rather than repeated scans. New or worsening pain, blanching or dusky skin, increasing swelling, visual symptoms, or signs of infection warrant prompt medical assessment; imaging should not delay urgent care. Keep images securely stored and make comparisons with the patient’s consent. Small differences can be hard to interpret. The record may still feel incomplete, especially when baseline images are inconsistent. That limitation deserves to be stated, not hidden.

FAQS

Why is the midface difficult to assess from appearance alone?

It contains fat layers, muscles, ligaments, bone, and vessels. A hollow beneath the eye may have more than one cause.

How can photographs make comparisons more reliable?

Use the same camera distance, head position, lighting, and expression. Soft, even light helps. Shadows can deceive.

What can ultrasound show in the midface?

It can show superficial tissue layers and some vessels in real time. Results depend on probe angle, pressure, and operator skill.

When might MRI or CT be considered?

MRI can clarify deeper soft tissues. CT shows bone clearly but involves radiation, so it may not suit a soft-tissue question alone.

Does imaging explain every facial contour?

No. A scan is a snapshot. It cannot always reveal the cause or predict tissue behavior.

Should natural asymmetry be treated as a problem?

Not by itself. Compare both sides, but consider the person’s history, examination, and changes during smiling.

Can a three-dimensional scan replace an in-person examination?

No. It adds context, but misses some tissue details. Images should support a clinician’s assessment, not replace it.

What should happen when images and examination findings conflict?

Pause and review the lighting, angles, and clinical findings. Sometimes the pictures look more certain than the live examination.

Why document how facial images are handled?

Explain how images will be used and stored, and document consent. Small details matter.

Conclusion

Midface Volume Correction Imaging provides a structured way to assess the soft tissues and underlying anatomy of the central face. By examining the cheeks, under-eye region, and surrounding facial contours, clinicians can identify areas of volume loss, differences between the two sides, and changes that may influence treatment planning. Consistent imaging methods and clear anatomical landmarks help make these observations more objective and easier to compare.

Images can also support individualized planning by showing where volume correction may be considered and how the intended result relates to overall facial balance. Before proceeding, safety checks should include reviewing the patient’s history, confirming the assessment, and documenting a reliable baseline. Follow-up imaging, captured under similar conditions, can help evaluate changes over time, monitor symmetry, and guide appropriate reassessment. Used thoughtfully, imaging supports careful communication and planning without replacing clinical judgment.

Arthur

Arthur

Arthur is a professional marketing specialist with extensive experience in product communication, content strategy, and customer-focused brand development. As a key member of the company, he combines strong market insight with a deep understanding of the company’s products, enabling him to explain......